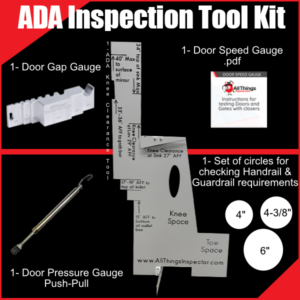

Vague ADA deficiency reports cost thousands in rework and project delays. Contractors need specific measurements, clear photographs, exact code references, and actionable remediation steps to bid accurately and complete corrections properly. This guide teaches building inspectors, facility managers, and accessibility consultants how to document deficiencies with contractor-level precision, eliminating confusion and ensuring first-time compliance.
Why Do Most ADA Deficiency Reports Fail Contractors?
Poor documentation creates frustration, inflated bids, and failed corrections. The most expensive documentation failure occurs when contractors begin work only to discover the actual deficiency differs from what was described, resulting in change orders that cost 150 to 300 percent of original installation expenses.
The Top 5 Documentation Failures:
- Vague location descriptions – “Bathroom door” could mean any of fifteen doors across multiple floors
- Missing precise measurements – “Door too narrow” provides no bidding information
- Unclear photo angles – Blurry images showing partial views reveal nothing about the actual violation
- No code section references – Contractors cannot verify solutions without knowing which standard was violated
- Lack of remediation guidance – Problem identification without solutions forces contractors into trial-and-error approaches
Contractors encountering vague documentation typically add 20 to 40 percent contingency to their bids. Projects with poor documentation average 2.5 times more change orders than those with precise specifications.
What Information Must Every ADA Deficiency Entry Include?
Every deficiency entry requires seven critical elements for contractors to scope work accurately. Missing even one element forces contractors to inflate bids or contact you for clarification.
The Seven Essential Elements
- Precise Location Identification
- Building/area: East Wing, Ground Floor
- Room number: 102 (Women’s Restroom)
- Specific element: Lavatory at west wall
- Context: Middle sink of three fixtures
- ADA Standard Citation Section 606.2 – Clear Floor Space: 30 inches minimum by 48 inches minimum required at lavatories
- Existing Condition Measurement Measured 28 inches wide at centerline using ADA door gap gauge with door at 90-degree open position
- Variance from Standard 4 inches narrower than required 32-inch minimum (12.5% deficiency)
- Photographic Evidence See Photos 012-014 showing door width measurement with gap gauge displaying 28-inch reading
- Remediation Specification Install offset hinges to achieve 32-inch minimum clear opening, OR widen door opening to 34-inch nominal width. Offset hinges preferred for minimal disruption.
- Priority Level Priority 1 – Entrance accessibility (immediate correction required). High legal risk as entrance deficiency affects all facility access.
How Should You Describe Deficiency Locations for Contractor Clarity?
Location descriptions must guide contractors who have never visited the property directly to the deficient element.
Bad: “Bathroom door too narrow”
Good:
- Building: East Wing, Ground Floor
- Room: 101 – Men’s Public Restroom
- Element: Entrance door, north-facing at main corridor junction
- Reference: Floor Plan Sheet A-2, Grid C-4
Key practices:
- Use compass directions (north/south/east/west) not “left/right”
- Include room numbers from architectural plans
- Reference multiple fixtures for context (“third stall from entrance”)
- Describe approach path from known landmarks
- Note adjacent features (“opposite fire extinguisher cabinet”)
What Measurement Documentation Standards Ensure Contractor Accuracy?
Contractors bid based on documented measurements. Professional documentation includes the dimension, measurement method, tool used, and exact location.
Element | Documentation Format | Tool Required |
Door Clear Width | “30” clear (32″ req’d) – 2″ deficiency” | ADA door gap gauge |
Door Opening Force | “7.2 lbf (5.0 max) – 2.2 lbf over” | Calibrated pressure gauge |
Grab Bar Height | “38” AFF (33″-36″ req’d) – 2″ high” | Tape measure |
Knee Clearance | “25” at 8″ depth (27″ min req’d)” | |
Ramp Running Slope | “1:10 ratio (1:12 max required)” | Digital inclinometer |
Critical practices:
- Record measurement location (“at centerline,” “at latch edge”)
- Document tool used
- Note obstructions affecting measurement
- Take multiple measurements if conditions vary
- Record temperature for door pressure tests
How Do You Photograph ADA Deficiencies for Maximum Contractor Understanding?
The three-photo method creates complete visual documentation eliminating contractor confusion.
Photo 1 – Context Shot: Shows entire room with deficient element visible
Photo 2 – Detail Shot: Frames deficient element with adjacent features
Photo 3 – Measurement Proof: Close-up with measurement tool clearly readable
Best practices:
- Number photos sequentially (001, 002, 003)
- Use consistent naming: “BuildingA_Room101_Door_001.jpg”
- Include measurement tools showing actual readings
- Photograph from multiple angles
- Ensure adequate lighting without shadows
- Take landscape orientation
- Maintain photo log linking numbers to locations
Which ADA Code References Should Appear in Contractor Documents?
Contractors need exact code citations to understand requirements and defend their work.
Complete Citation Example:
Deficiency: Door opening force exceeds maximum
Code Reference: 2010 ADA Standards, Section 404.2.9 – Door Opening Force
- Interior doors: 5.0 pounds maximum force
- Exception: Fire doors have minimum opening force allowable by authority
Advisory 404.2.9: Forces measured perpendicular to door face. Changing hardware, adjusting closers, or installing power operators are common solutions.
Required components:
- Document title and year (2010 ADA Standards)
- Complete section number (404.2.9, not just 404)
- Exact requirement language
- Applicable exceptions
- Advisory notes for compliance guidance
- Figure references when helpful
What Remediation Specifications Must You Provide to Contractors?
Every deficiency needs actionable correction methods with sufficient detail for accurate bidding.
Example Problem: Men’s restroom entrance door measured 30 inches clear (32 inches minimum required) – 2-inch deficiency.
Option 1 – Offset Hinges (Preferred)
- Product: Swing-clear hinges, 2-inch minimum offset
- Result: Gains 1.5-2 inches clear width
- Cost: $150-300 per door
- Timeline: 1-2 hours, minimal disruption
Option 2 – Narrow Frame Profile
- Specification: Replace frame with narrow-profile model
- Result: Achieves 32-33 inches clear
- Cost: $800-1,200 per opening
- Timeline: 4-6 hours, restroom closure required
Option 3 – Widen Opening
- Specification: Demolish and reframe to 34-inch nominal
- Result: Full compliance with margin
- Cost: $2,500-4,000 per opening
- Timeline: 8-12 hours, 1-2 day closure
Required elements:
- Specific products or performance standards
- Installation methods
- Verification procedures
- Expected outcome measurements
- Cost ranges and timeline estimates
How Do You Organize Multi-Deficiency Reports for Contractor Efficiency?
Strategic organization helps contractors scope work and sequence corrections efficiently.
Priority-Based Organization:
Priority 1 – Entrance Accessibility Parking, accessible routes, entrance doors, building signage
Priority 2 – Access to Goods/Services Interior routes, service counters, sales areas, communication systems
Priority 3 – Restroom Accessibility Toilet room entrances, compartments, fixtures, grab bars
Priority 4 – Additional Access Drinking fountains, telephones, directional signage
Secondary Organization – By Trade:
Within each priority, group by specialty:
- Concrete/Paving: Parking, curb ramps, pathway repairs
- Carpenter/Framing: Door widening, counter adjustments
- Door Hardware: Closer adjustments, lever handles, thresholds
- Plumber: Lavatory replacements, fixture relocations
- General Contractor: Grab bars, signage, partitions
Deficiency | Location | Priority | Trade | Cost | Status |
001 | Parking Space 5 | 1 | Paving | $200-400 | Pending |
002 | Main Entrance | 1 | Door Hardware | $150-300 | Pending |
What Software and Templates Streamline ADA Deficiency Documentation?
Standardized templates ensure consistent quality while reducing inspection time.
Field Inspection Apps:
- Digital checklists with photo integration
- GPS location tagging
- Voice-to-text notes
- Offline capability
- Examples: eAuditor, Site Audit Pro, Safety Sync
Report Template Sections:
- Executive Summary (deficiency count by priority)
- Property Information
- Inspector Credentials
- Methodology Statement
- Detailed Findings (organized by priority)
- Photo Appendix
- Cost Estimates (optional with disclaimers)
- Remediation Timeline
Photo Management:
- Consistent naming conventions
- Automatic metadata capture
- Batch resizing for reports
- Cloud backup
- Folder structure matching report organization
Professional ADA inspection tools provide accurate measurements that digital systems capture and organize efficiently.
How Should Reports Address Cost Estimates for Contractors?
Cost estimates help property owners budget but require careful documentation.
Three-Tier Cost System:
Low: Basic solution, minimal disruption ($75-150) Mid: Standard contractor work, quality materials ($150-300) High: Complex corrections, specialized contractors ($300-600)
Essential Disclaimer: “Cost estimates provided for budgetary planning only. Actual costs vary by contractor, market conditions, and site conditions. Property owner responsible for obtaining multiple bids. Inspector assumes no liability for estimate accuracy.”
Cost Organization Table:
Priority | Count | Low | Mid | High |
1 – Entrance | 12 items | $3,200 | $6,800 | $12,400 |
2 – Services | 8 items | $1,400 | $3,600 | $7,200 |
3 -Restrooms | 24 items | $8,600 | $18,400 | $31,200 |
What Quality Control Steps Ensure Report Usability?
Pre-Delivery Checklist:
- Completeness: All seven elements present for each deficiency
- Accuracy: Measurements verified, math checked, code sections confirmed
- Clarity: Location descriptions specific, terminology defined, instructions actionable
- Organization: Sorted by priority/trade, table of contents included
- Contractor Test: Can they locate deficiencies and bid from documentation?
Continuous Improvement:
- Collect contractor feedback on report format
- Track which elements caused confusion
- Note deficiency types requiring clarification
- Refine templates based on field experience
Conclusion
Effective ADA deficiency documentation transforms inspection findings into actionable contractor work orders. Every deficiency requires seven essential elements: precise location, code citations, measured conditions, variance calculations, photographs, remediation specifications, and priority assignments. Organize reports by priority and trade to streamline bidding and execution.
Quality documentation eliminates costly change orders, prevents compliance disputes, and accelerates remediation. Professional measurement tools ensure accuracy and legal defensibility. From door pressure gauges to knee clearance templates, proper equipment produces measurements contractors trust.
Ready to create contractor-ready ADA documentation? Shop our complete line of professional ADA inspection tools designed for accurate deficiency documentation.
FAQs
How many photos should I take for each ADA deficiency?
Take three photos minimum: a wide context shot, a mid-range detail view, and a close-up with the measurement tool visible showing the actual reading.
Do I need to include cost estimates in ADA deficiency reports?
Cost estimates are optional. Include three-tier ranges (low/mid/high) with disclaimers that actual costs vary and property owners must obtain competitive bids.
What’s the difference between Priority 1 and Priority 4 ADA deficiencies?
Priority 1 covers entrance accessibility (parking, routes, doors) preventing facility access. Priority 4 addresses amenities (fountains, phones) with lower urgency.
Which measurement tools are necessary for documenting ADA deficiencies?
Essential tools: calibrated door pressure gauges, door gap gauges, knee clearance templates, digital inclinometers. Standard tape measures work for basic dimensions.
How should I organize reports for facilities with many violations?
Organize by DOJ priority (1-4) first, then by trade specialty within each priority. Include a summary table showing deficiency counts and cost ranges.