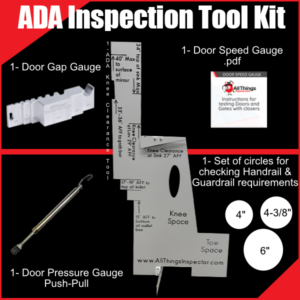
When making renovations, there are many things you need to consider, from the structure to the aesthetics of the building. However, one major aspect that should not be overlooked is ensuring the building meets ADA standards. Using an ADA-compliant tape measure during renovations is a simple way to ensure your building is accessible to everyone, including those with disabilities. The ADA tape measure helps you take accurate measurements that align with ADA guidelines, saving you time, money and potential legal problems.
Here’s a guide to when and where you should use an ADA tape measure during renovations.

Before you begin renovating your building, an ADA tape measure is useful in assessing the current state of your building. Use it during the initial stage to measure doorways, hallways and other key areas to identify areas that need modifications. Starting with accurate measurements ensures your renovation plans align with ADA standards from the outset.
Adding accessibility features to your design is necessary, but it’s also important to test and verify their importance. An ADA tape measure helps you ensure your design specifications meet the precise ADA requirements. This helps to prevent costly changes later in the renovation process.
During the renovation process, using an ADA tape measure ensures that every new feature such as grab bars, ramps, and counters is installed to the correct dimensions. Measuring during construction ensures the installation aligns with ADA standards and is maintained throughout the project.
Doorways, being the entrance to any building are often violated when it comes to meeting ADA standards. Use an ADA tape measure to check that door widths are at least 32 inches wide when the door is open; thus allowing enough space for wheelchair users.
Ramps are important in a building to ensure accessibility, but they must be installed to meet ADA requirements. Use an ADA tape measure to ensure the slope ratio is 1:12, meaning for every inch of rise, the ramp should be at least 12 inches long.
Restrooms require accurate measurements to comply with ADA standards. Use your tape measure to check the placement of grab bars, which should be 33-36 inches from the floor. Also, ensure there’s at least 60 inches of turning space for wheelchair users.
ADA standards also apply to outdoor areas like parking lots. Use an ADA tape measure to measure the width and length of accessible parking spaces. Ensure they meet the minimum requirements of 8 feet wide for regular spaces and 11 feet wide for van-accessible spaces.

An ADA tape measure is an important tool that must be available on-site during renovations. It helps you create an accessible and compliant space. Using the ADA tape measure in critical areas helps you avoid costly mistakes and ensures your building meets ADA standards.


As a business owner, you have a responsibility to ensure that your business complies with the Americans with Disabilities Act(ADA). Not only is it a

When making renovations, there are many things you need to consider, from the structure to the aesthetics of the building. However, one major aspect that
When making renovations, there are many things you need to consider, from the structure to the aesthetics of the building. However, one major aspect that should not be overlooked is ensuring the building meets ADA standards. Using an ADA-compliant tape measure during renovations is a simple way to ensure your building is accessible to everyone, including those with disabilities. The ADA tape measure helps you take accurate measurements that align with ADA guidelines, saving you time, money and potential legal problems.
Here’s a guide to when and where you should use an ADA tape measure during renovations.

Before you begin renovating your building, an ADA tape measure is useful in assessing the current state of your building. Use it during the initial stage to measure doorways, hallways and other key areas to identify areas that need modifications. Starting with accurate measurements ensures your renovation plans align with ADA standards from the outset.
Adding accessibility features to your design is necessary, but it’s also important to test and verify their importance. An ADA tape measure helps you ensure your design specifications meet the precise ADA requirements. This helps to prevent costly changes later in the renovation process.
During the renovation process, using an ADA tape measure ensures that every new feature such as grab bars, ramps, and counters is installed to the correct dimensions. Measuring during construction ensures the installation aligns with ADA standards and is maintained throughout the project.
Doorways, being the entrance to any building are often violated when it comes to meeting ADA standards. Use an ADA tape measure to check that door widths are at least 32 inches wide when the door is open; thus allowing enough space for wheelchair users.
Ramps are important in a building to ensure accessibility, but they must be installed to meet ADA requirements. Use an ADA tape measure to ensure the slope ratio is 1:12, meaning for every inch of rise, the ramp should be at least 12 inches long.
Restrooms require accurate measurements to comply with ADA standards. Use your tape measure to check the placement of grab bars, which should be 33-36 inches from the floor. Also, ensure there’s at least 60 inches of turning space for wheelchair users.
ADA standards also apply to outdoor areas like parking lots. Use an ADA tape measure to measure the width and length of accessible parking spaces. Ensure they meet the minimum requirements of 8 feet wide for regular spaces and 11 feet wide for van-accessible spaces.

An ADA tape measure is an important tool that must be available on-site during renovations. It helps you create an accessible and compliant space. Using the ADA tape measure in critical areas helps you avoid costly mistakes and ensures your building meets ADA standards.