The Americans with Disabilities Act (ADA) requires public facilities and businesses to remove barriers that make access difficult for people with disabilities. However, many clients struggle to make every update at once, especially when older buildings, incomplete records, or inconsistent maintenance are involved.
This is why a prioritisation plan becomes essential. It helps you guide your client toward improvements that reduce legal exposure, improve accessibility, and fit their budget. Focusing first on the most meaningful fixes allows facilities to demonstrate good-faith compliance, which the Department of Justice (DOJ) considers during enforcement.
1. Start with High-Risk, High-Liability ADA Violations
Some ADA violations expose your client to immediate legal and safety risks. These should always be the first items you address, even with a limited budget.
Examples include:
- Non-compliant accessible parking: incorrect slope, missing signage, or faded striping
- Steep or unsafe ramps: slope above 1:12, missing handrails, or uneven surfaces
- Inaccessible entrances: heavy doors, narrow doorways, or thresholds too high
- Restroom hazards: missing grab bars, improper clearances, or unsteady fixtures
These issues can prevent individuals from entering the building or create dangerous conditions, making them top priority. Focusing here reduces liability and improves safety immediately.
2. Prioritise Barriers That Affect the Most Users
After addressing the highest-risk violations, look for barriers that impact the greatest number of people. These are often located in high-traffic or essential service areas, such as:
- Main entrances
- Reception or check-in counters
- Public restrooms
- Hallways and primary routes
- Waiting rooms
- Service counters or transaction points
The ADA concept of “program accessibility” emphasises that public areas used most often must be functional for everyone. Correcting these spaces early maximises impact and increases daily accessibility for all visitors.
3. Fix the Low-Cost, High-Impact Items First
Even with a tight budget, your client can make meaningful progress by tackling small, inexpensive adjustments that significantly improve compliance. These are often the easiest wins and create immediate accessibility upgrades.
Examples include:
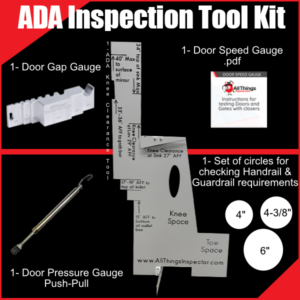
- Adjusting door pressure using a door pressure gauge to meet ADA force requirements
- Re-striping or repainting accessible parking with correct measurements
- Lowering or raising bathroom accessories such as mirrors, soap dispensers, or paper towels
- Adding or replacing compliant signage
- Correcting minor door gaps using proper measurement tools
- Improving lighting or contrast in circulation areas
These changes don’t require major construction and can be completed quickly. They also show proactive compliance, which can help if a claim or complaint arises.
4. Break Down ADA Improvements Into Phases
A structured, phased approach helps your client stay organised and financially prepared. It also aligns with DOJ guidance on transition plans in cases where immediate full compliance is not possible.
A simple phased plan may look like this:
Phase 1: Immediate Fixes (0–30 days)
High-risk violations, essential access points, and low-cost corrective actions.
Phase 2: Short-Term Improvements (30–90 days)
Public area upgrades, restroom adjustments, and improvements affecting large groups.
Phase 3: Long-Term Projects (3–12 months)
Larger construction-based upgrades such as ramp reconstruction, restroom reconfiguration, or major doorway adjustments.
This structured plan demonstrates responsibility and long-term commitment to accessibility.
5. Use Data to Justify Priorities to Your Client
Clients often want clear reasoning behind why certain ADA items must come first. Supporting your recommendations with objective data builds trust and reduces pushback.
You can strengthen your justification by using:
- Measurement tools (door pressure gauge, gap gauge, slope tools)
- Photo documentation of violations
- Official ADA references (ADA 2010 Standards, DOJ guidance)
- Risk ratings based on safety, frequency, and legal exposure
- Cost estimates for each phase
Transparent, data-backed explanations help your client understand the importance of acting now, even with a limited budget.
6. Document Everything for Legal and Future Planning
Good documentation is essential, especially when budget limitations prevent full compliance. Keeping organized records helps show that your client is making progress and acting in good faith.
Documentation should include:
- Inspection notes and findings
- Date-stamped photos
- Phased improvement plan
- All measurements taken
- Any completed fixes
- Known future upgrade plans
This protects your client if there is ever a complaint or audit and helps you track progress on future visits.